 |
The much-awaited Adobe Lightroom 2.0 was released July 29th after a brief 4 month Beta period. With out hesitation, for reasons I’ll explain later, I upgraded my copy of Lightroom to version 2 the day it was announced. Now that I’ve had a chance to use the application in real world conditions for the past week I wanted to share my impressions of it.
Since Lightroom went into its initial Beta I’ve been sold on the concept of non-destructive editing of my RAW files. Lightroom 1.0 for all intents and purposes was a great first step combining a state of the art RAW converter, basic digital asset management technology and thanks to Phil Clevenger a revolutionary user interface. Additional functionality to ease printing and web gallery output rounded out the application. Streamlined to help photographers more quickly manage large and small quantities of photography alike Lightroom’s release still seemed to confuse some diehard Photoshop users. What about localized edits and masks? For that Lightroom 1.0 users would still need to rely on Photoshop, initiating the editing of a file in Lightroom and working on a copy in Photoshop. All in all a great first step but far from reaching it’s full potential.
Enter Lightroom 2.0, building on the applications core functionality non-destructive photo editing has been taken to the next level. In version 2 the strengths of each core function has been enhanced. The new features that are making the biggest impact in my day-to-day use of the program include:
Smart Collections
 Click To Enlarge |
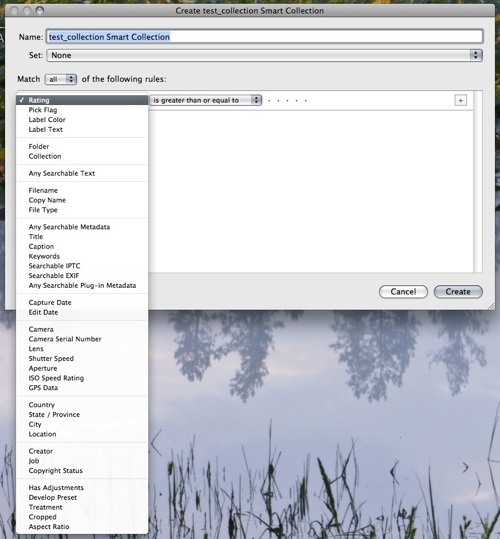
This feature single-handedly was the biggest reason behind my upgrade. When I learned this feature was in Lightroom 2 Beta I knew I would upgrade to version 2 immediately. The manual collections with in the first version of Lightroom were helpful, but severely limiting. More times than I can count I’ve needed to generate collections based on specific keywords (location, subject, etc.), date or rating. The ability to dynamically pull together collections of images across multiple photo sets is incredibly helpful and a huge time saver. This is especially true when looking to create a new collection or build out existing collections as new photos are added to an image library.
Local Adjustments
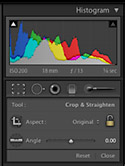
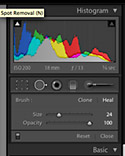
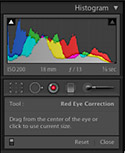
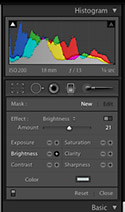
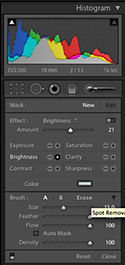
Lightroom 1.x was all about global adjustments such as color correction, curve adjustments, vignetting, etc. Lightroom 2 now has the ability to apply local adjustments through the following editing tools: Crop Overlay tool, Spot Removal brush, Red Eye Correction tool, Graduated Filter mask, and Adjustment Brushes mask. The Crop Overlay tool provides a quick means of cropping and even leveling ones photo. The Spot Removal brush has been enhanced to clone or heal with a user defined opacity. The Red Eye Correction tool now provides a drag and correct feature to customize the shape of the correction area. The Graduated Filter mask enables gradient-based masks to adjust exposure, brightness, etc. (more on this below). Finally the Adjustment Brush mask enables you through a brush tool to adjust exposure, brightness, contrast, saturation, clarity, sharpness, color and even skin softness.
Knowing Adobe I can see the types of Local Adjustment tools expanding in the future and/or having the existing tools refined further. For images that require minor edits or tweaks these editing tools give photographers a greater degree of flexibility and saves time in cutting out the need to use Photoshop for relatively basic types of edits. I wasn’t missing localized edits too badly in the first version of Lightroom, but now that I have them at my fingertips I don’t know how I lived with out them.
Graduated Filter Masks
 Click To Enlarge |
 Click To Enlarge |
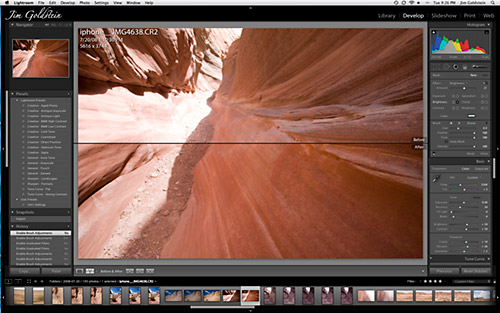 Click To Enlarge |
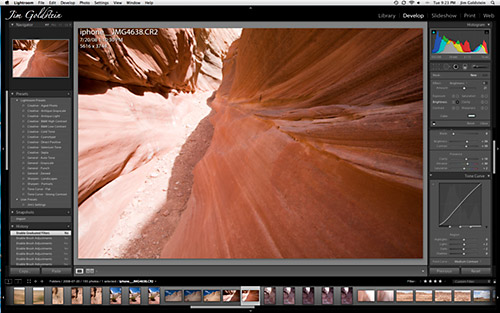
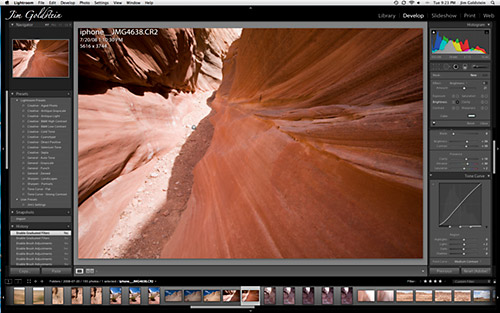
This local adjustment tool is worthy of noting individually due to the broad impact it likely will have on my work and the work of others. Managing scenes with a dynamic range beyond the capabilities of a cameras film or sensor has troubled photographers for decades. These days people are increasingly using HDR to deal with this or are double-processing RAW files. For those like myself that prefer pre-processing techniques Graduated Neutral Density Filters have been the solution.
The Graduated Filter masks provide a means to handle an image in a similar fashion to both double-processing and the use of Graduated Neutral Density filters. A Graduated Filter mask(s) can be applied adjusting exposure and/or brightness. Rather than processing the same RAW file twice to double-process or use a Graduated Neutral Density filter when taking a photo one can simply apply the appropriate mask to balance the exposure. It should be noted these masks aren’t just limited to exposure and brightness adjustments. Graduated filter masks can also be applied for contrast, saturation, clarity, and sharpness adjustments.
Does this function equate to the death knell of Graduated Neutral Density filters? I would argue no. Being able to manage light before it reaches ones film or sensor will never go out of style. Certainly use of the Graduated Filter mask can only help, but for my line of work it’s not a replacement. Over time perhaps my tune will change. In the meantime I look forward to experimenting with this adjustment tool to find its limits and sweet spot of use.
Centralized UI for Editing Tools
From a User Interface (UI) perspective the already streamlined Lightroom interface has been improved. When in the “Develop” module of the application, editing tools used for local adjustments are now tightly centralized in the upper right hand corner of the screen. Having the Crop Overlay tool, Spot Removal brush, Red Eye Correction tool, Graduated Filter mask, and Adjustment Brushes mask in one consistent location is a real time saver particularly if using a large monitor or dual screens.
 Click To Enlarge |
 Click To Enlarge |
 Click To Enlarge |
 Click To Enlarge |
 Click To Enlarge |
Volume Management
 Click To Enlarge |
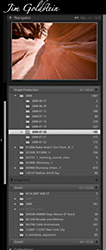
Lightroom 2 now has a more intuitive means of visually displaying photo directories on their respective hard drives and the status of the drive to let you know if the files can be accessed. Seemingly simple in concept this was lacking in the first version of the application and was a pet peeve of mine. In the original version of Lightroom it was a common occurrence to navigate through your library find a photo set, load the set to view image previews, click on an image and then be told the image was off-line. For those with photos stored across multiple drives the inclusion of this feature now makes it easier to identify where content resides and whether or not the drive is connected or turned on saving you time and frustration.
CS3 Integration
 Click To Enlarge |
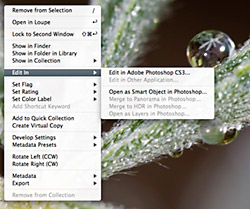
Expanding on the “Edit in Adobe Photoshop” feature it is now possible in Lightroom 2 to select photographs and “Open as Smart Object in Photoshop”, “Merge to Panorama in Photoshop”, “Merge to HDR in Photoshop” or “Open as Layers in Photoshop”. Clearly the big take away from these added functions are Adobe’s willingness to streamline more complex image creation. I don’t expect Lightroom to pick up built-in HDR or Panoramic functionality, but the fact it is now easier and faster to utilize this functionality in Photoshop is worthy of praise.
Multiple Display Support
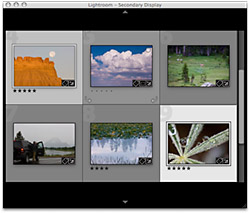
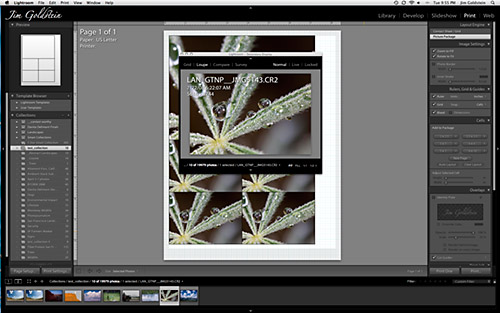
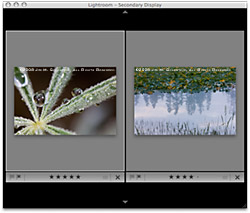
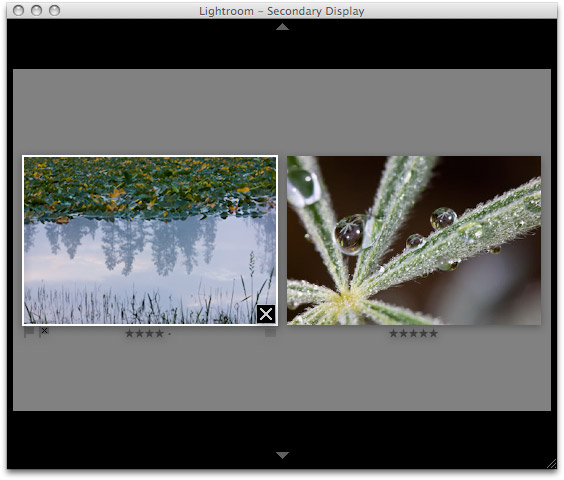
The majority of photographers dream of having a computer setup utilizing multiple monitors. For those lucky enough to have a multiple monitor configuration on their workstation or laptop this feature will make you very happy. In this version of Lightroom Adobe took multiple monitor support one step further by providing 4 multiple display functions to assist in image sorting, ranking and comparison. The multiple display functions include Grid, Loupe, Compare and Survey.
These display options should sound familiar as they’re the same display options available in the default single monitor mode. The loupe view for the second monitor does include 3 viewing mode options: Normal, Live and Locked. The Normal mode displays the same image on both monitors with the option to set a different zoom ratio. This is helpful when evaluating subtle edits. The Live mode turns the second monitor into one large loupe displaying the portion of the image your cursor is over in the scaled original on the main monitor. The Locked mode displays a fixed size preview of an image on the second monitor. Changing the image requires the use of keyboard commands “alt/option and Enter”.
 Click To Enlarge |
 Click To Enlarge |
 Click To Enlarge |
 Click To Enlarge |
Enhanced Sharpness Tool
The ability to make localized adjustments for sharpness is another time saving function, but what really makes this function note worthy is the ability to utilize Auto Masks. After specifying your brush size, edge softness and flow rate you can activate the “Auto Mask” option. When active brush strokes are confined to areas of similar color. This works particularly well when keeping sharpness adjustments to specific objects with in your image. As with other localized adjustments a circular point will mark the spot of the completed adjustment. Mousing over the circular point will activate a highlight of the effected area.
Other Features of Note
- 64-bit processing support – For those with the latest Mac OS and Windows systems Lightroom will take advantage of their advanced memory handling capabilities.
- Print Packages – Quickly choose and customize print package layouts to conserve paper and ink.
- Output Sharpening – Select from sharpening presets for different types of print and web output.
- Enhanced Batch Processing – In addition to naming and organizing photos on import from your CF cards it is now possible to apply preset adjustments.
- Camera Profiles – Lightroom 2 (and Camera RAW 4.5) now support alternate camera profiles that can be loaded and referenced in the Camera Calibration panel. Profiles that match camera manufacturer color appearances such as Canon’s Picture Styles (Standard, Landscape, Neutral, Portrait and Faithful) could be applied via this feature.
Concluding Thoughts
The Adobe Lightroom team has been exceptionally busy the past several months and they’ve done an exceptional job in hearing their users via the Beta program. Lightroom 2 has been one of the best upgrades I’ve invested in over the past year or two. As Lightroom improves so too does my end product and overall productivity. As a photographer striving to make the most of his limited time Lightroom has proven to be an essential asset.
Adobe Lightroom Features and Shortcuts – Lightroom Journal
[tags]Adobe, Lightroom 2, Lightroom, software, review[/tags]

What about the upgrade process? Has it been seamless?
Pingback: First Impressions :: Lightroom 2
@luca Great question! That is the one part of upgrading to Lightroom 2 that I seemed to miss in my review. The upgrade process is quite straight forward. Once the installer is uncompressed from being downloaded, at least on an Apple computer, you copy the application over from the install image to your Applications folder. Upon opening the application you’re prompted to enter enter your original & upgrade serial number. It wasn’t made clear in the install notes but the upgrade serial number is received my email so you may have to wait a few minutes if you upgrade immediately after you download Lightroom 2. Once the application starts up it will prompt you to upgrade you Lightroom library/database. Since I make regular backups of my libraries I wasn’t too worried about something going wrong. Fortunately the image library was optimized and upgraded to include the fields used by Lightroom 2 with out a problem. After this step you’re ready to use Lightroom 2 unimpeded.
–
Other than the email hiccup during the upgrade I had no problems. The key is to be paranoid and always have backups of your Lightroom libraries.
Pingback: photographyVoter.com
Pingback: Links - August 8, 2008 « Photo Notes: Photography by Patty Hankins and Bill Lawrence
Pingback: Link Roundup 08-09-2008
Have you noticed that importing photos and generating the initial previews is massively slower in this new version? It’s driving me crazy…
For me the new version seems faster for imports and generating previews (on a MacPro 8core 2.8GHz/6GB RAM) – though I have read some reports about 64-bit mode actually causing a slow down. I just changed to 64bit to give it a try, and haven’t had a chance to get a feel for any speed changes yet.
The better identification of hard drives is a very welcome addition – we are all accumulating lots of these now!
Graduated adjustment tool – awesome.
I have experienced some keyword corruption when just typing them into the keyword free-text field.
I am just working my way through the Reichmann/Schewe 7.5 hour tutorial… nice job so far.
Parametric editing is still in its infancy – just imagine what the future will hold…
Pingback: 4 Quick Ways to Boost Lightroom 2 Performance | JMG-Galleries - Jim M. Goldstein Photography: travel, landscape, and nature pictures - stock photos and fine art prints
Nice article. As a Mac user not able to decide the path forward, it would be interesting to hear if you have anything to say about Lightroom 2 compared to Aperture 2.1. I use the latter because of what I consider a better interface, but am not satisfied with file handling.
What’s your say on the Aperture/Lightroom discussion?
@Mark let me know what you think of the Reichmann/Schewe video. I’m curious if its worth while.
–
@Geir Thanks. I’m glad the article was of interest. I have not tested Aperture 2.x as of yet. If I do give it a test run I’ll gladly write a review.
–
As it relates to my peers who have used both I’ve found that they’ve fallen subject to having a bias towards what they are first exposed to. There generally has to be something that rubs them the wrong way to make a complete leap from one to the other. That being said I know of Apple employees that have switched over to Lightroom and use Aperture sporadically. On the other hand I know people that feel most comfortable using Aperture. Take that for what its worth. If I have time in the future I’ll be happy to review Aperture 2.1. If that happens I’ll let you know
–
Thanks for the comment.
Pingback: Lightroom 2 — Impress and Perform « ChromaticSoul :: The Blog